Creating a Reverse Proxy
Creating a Reverse Proxy
For this guide, you must have access to a domain and the ability to alter that domain's DNS settings. In this guide, we assume you have a domain with Cloudflare, but most registrars will work.
This section is for domains, where you should use CNAME records:
First, you will want to head over to your domain's DNS settings panel. In this demo, we will be using Cloudflare, and as an example domain, we will use example.com.
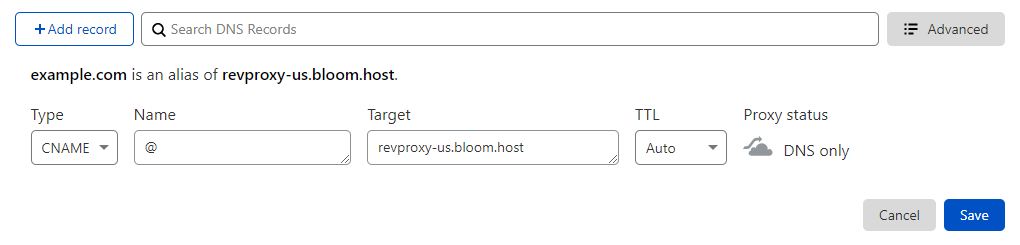
The DNS record usually used for a reverse proxy is a CNAME (canonical name). Different DNS providers may use different methods to reference the root of a domain. In most cases, you should put an @ inside the Name box.
You will want to create an identical CNAME record as the one pictured above, but you will replace the 'Target' field with the revproxy address corresponding to your location. For US servers it is: revproxy-us.bloom.host and for EU servers it is revproxy-eu.bloom.host.
This section is for subdomains, where you should use CNAME records:
Go to your domain's DNS settings. We will use Cloudflare for this demo and subdomain.example.com as an example domain.
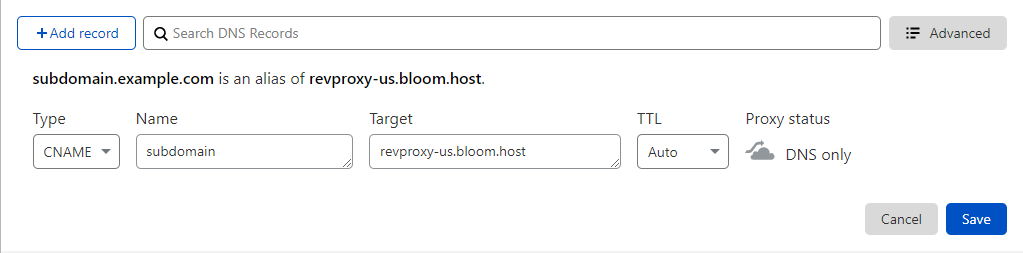
In this case, create a new CNAME record, identical to the one above. You will replace the word "subdomain" with the actual subdomain you want to use. In 'Target' you will write the revproxy address corresponding to your location. For US servers it is: revproxy-us.bloom.host and for EU servers it is revproxy-eu.bloom.host
CNAME records can take some time to propagate, though this depends on your ISP and other factors.
For more information, check out this page.
If you do use Cloudflare for DNS, make sure to set the 'Proxy status' as DNS only as it won't work if it's proxied.
Once you've created your CNAME record, go to your game panel and on the left sidebar, select 'Ports & Proxies'.
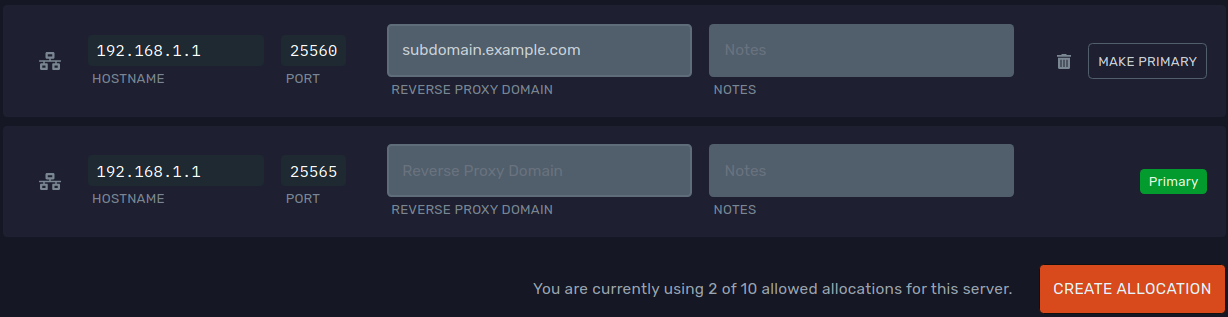
More than likely, you will have one allocation, but to create a reverse proxy, you will need to create a new allocation, to do so, just click 'Create Allocation'. A popup will appear asking you to write the port you want to use for your new allocation, you can use any port.
After creating the allocation and the DNS record, write the subdomain or domain you want to use for the reverse proxy in the "Reverse Proxy Domain" field in the Ports & Proxies section of our panel.