Using SFTP
Using SFTP
What is SFTP?
SSH File Transfer Protocol is one of the most popular methods of securely transferring files to remote servers.
We recommend you zip the files you want to upload to your server, uploading individual files through SFTP can take a long time. Once you have uploaded the .zip file to your server, you can go to the file manager in our Duck Panel, click on the three dots ... to the right of the .zip and click on Extract.
More Actions like compress, extract, rename, and others
If you wish to archive, unarchive or mass delete files, please check out or guide on file management through the panel.
Using SFTP

There are several so called SFTP Clients few of the more popular ones being WinSCP, MobaXTerm or FileZilla.
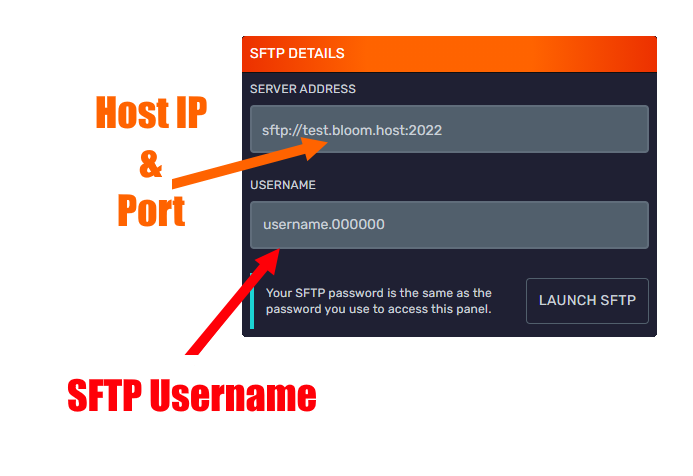
To find the login details, navigate to the sidebar of the server, then open the 'Settings' section.
Here you will be able to see your server's SFTP host IP address and port as well as your username! Your SFTP password is the same as your game panel password.
If you have WinSCP installed, you can launch straight away by clicking Launch SFTP.
Using WinSCP (Recommended, available only on Windows)
Firstly, you'll have to download WinSCP to your computer. - This should be simple with their installation wizard.
With our new panel, you can simply head over to the Duck Panel and click 'Launch SFTP' under 'Settings' on the left side of the screen. You'll simply need to enter your panel password and you are good to go!

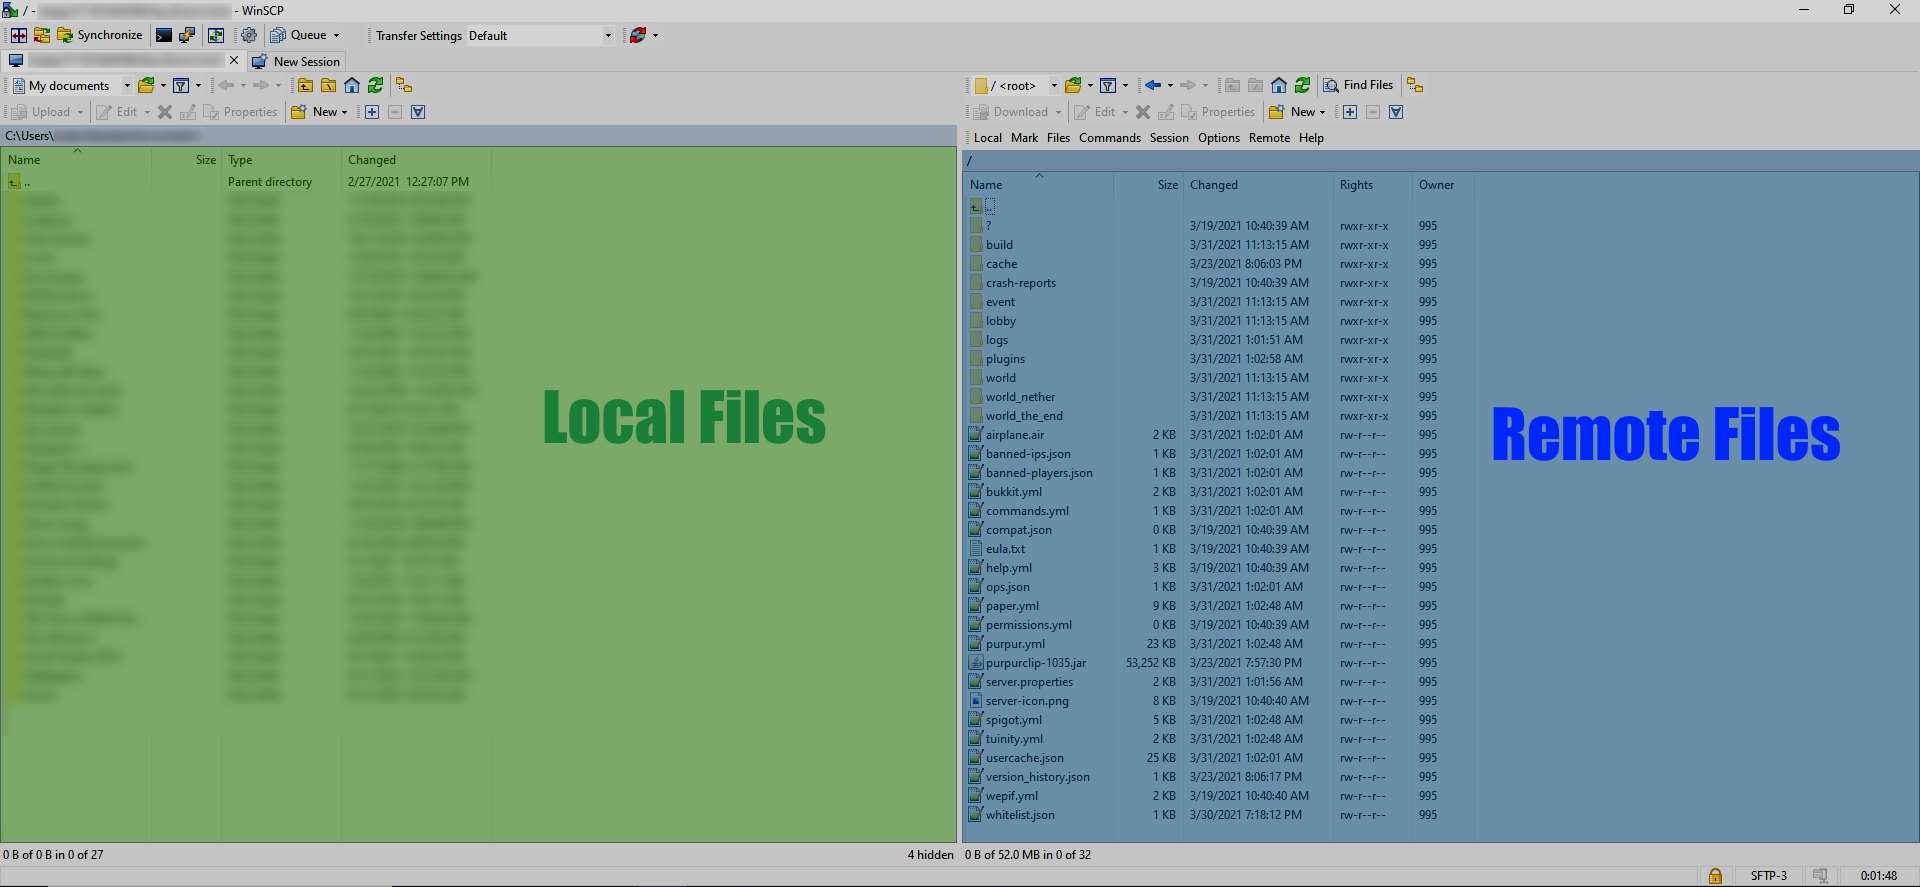
WinSCP is very similar to your basic Windows Explorer. However, on the left side of the screen (green area) you can see your local files and on the right side (blue area), you can see the remote server's files. You can drag, drop, rename and delete files as you wish.
Using Cyberduck (Available only on Mac)
Cyberduck is a popular free SFTP client for macOS.
- Download Cyberduck from the official website or the Mac App Store.
- Open the application and click Open Connection.
- From the dropdown menu, choose SFTP (SSH File Transfer Protocol).
- Enter your server’s host IP, port, username, and password (the same as your game panel password).
- Click Connect.
- You will now see your server files. Drag and drop files to upload or download them.
Other Options to connect to SFTP such as MobaXTerm (Windows), FileZilla (Windows, Mac and Linux), and Visual Studio Code
Using MobaXTerm (Available only on Windows)
Firstly, you'll have to download MobaXTerm. They offer both a free edition and a paid professional version. The installation wizard is straightforward.
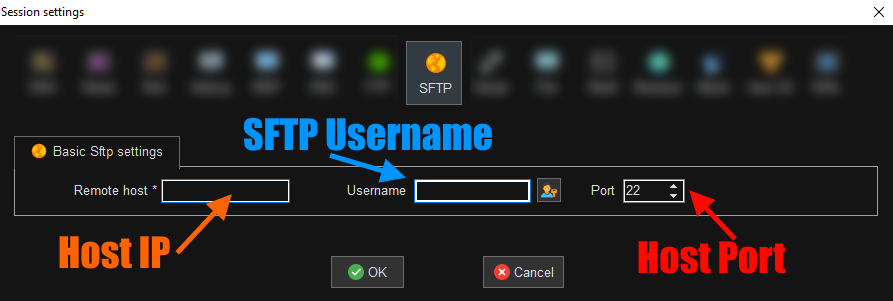
Once installed, launch the application. Right-click on the left side of the screen and click 'New Session'. Select 'SFTP' in the middle.

Enter your host's IP, port, and SFTP username (which can be found in the Duck Panel server settings tab). Then click 'Ok'.
You will be asked for your panel password, which will be stored by default.
On the left side (green area) you can see your local files, and on the right side (blue area) you can see the remote server's files. You can drag, drop, rename, and delete files as needed.
Using FileZilla (Available for Windows, Mac and Linux)
FileZilla is another popular and free SFTP client available for Windows, Mac, and Linux.
- Download FileZilla from the official website and install it.
- Open the program and go to the top bar where it says Host, Username, Password, and Port.
- Enter your server’s SFTP details (host IP, username, password, and port). Make sure the protocol is set to SFTP.
- Click Quickconnect.
- Your local files will appear on the left and your server files on the right. You can drag and drop files between them.
Using Visual Studio Code
You can also use Visual Studio Code to edit files via SFTP.
To do this, install the SFTP addon for Visual Studio Code for efficient file transfer.
- Install the extension on your IDE.

- Open a folder for your SFTP files (preferably separated to avoid clutter).
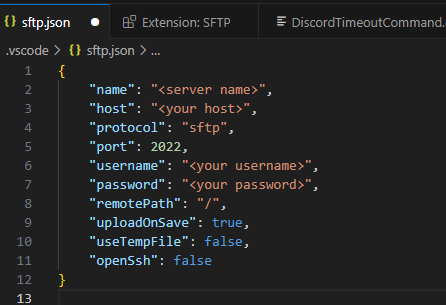
- Open the command palette (CTRL+SHIFT+P by default) and find the 'SFTP: Config' command.
- Set up your SFTP credentials in the
sftp.jsonconfig. Be sure to setuploadOnSavetotrue.

- In your settings, enable 'Download When Open In Remote Explorer'.
- That’s it. You can now find your files in the sidebar.
Tip: When you open a file that exists locally, avoid editing the local copy. If you edit the same file elsewhere (for example in Bloom File Explorer), there is a risk the local copy will overwrite your changes.